
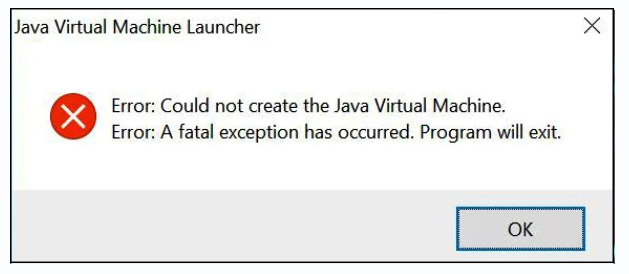
Complete Guide to Fix the “Could Not Create The Java Virtual Machine” Error: Users often face this issue while loading Java-based applications such as Minecraft and IDE packages such as Eclipse. The Java Virtual Machine (JVM) converts Java Byte code to machine-readable code. However, when you launch a Java application, the interpreter JVM fails to start, resulting in the Could not build the Java virtual machine error.
This error often occurs when the RAM allocation for Java is set lower than it needs. To resolve this problem, you may change the heap size. Other factors may also contribute to the occurrence of this Java error. Through this essay, we will go into the remedies for the numerous reasons for this issue and assist you in resolving it.
“Could Not Create The Java Virtual Machine” Error Causes
Here are some probable causes of Could Not Create The Java Virtual Machine.
- Inadequate Administrative Privileges
- Allotted heap memory is limited.
- In Java, the Path variable has been set incorrectly.
- Java Development Kit (JDK) or Run time environment that is out of date or corrupted (JRE)
Fixing Error: “Could Not Create The Java Virtual Machine”
Most users’ problems are often handled by allocating more heap memory. If you use an IDE such as Eclipse, you may also configure the VM from the its.ini file to resolve the issue.
Increase the RAM allocation
Larger heap size is required if you need to execute any heavy applications on JVM. The heap size is set to 256 MB by default. If the necessary amount of memory is not assigned to the JVM, Java Could not create the Java virtual machine error may occur. Follow these procedures to provide the Java VM with 512 MB of RAM.
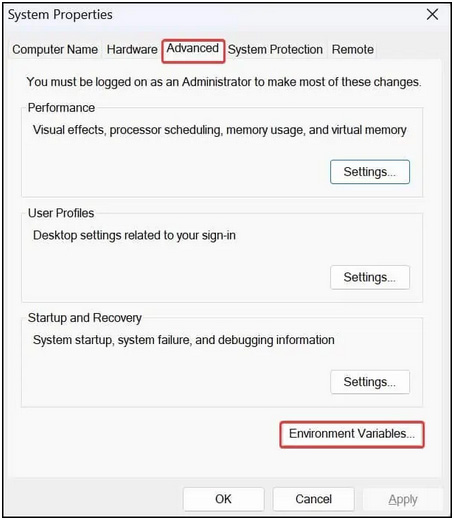
1. Enter sysdm.cpl by pressing Windows key + R.
2. Navigate to the Advanced tab and choose the Environment variables option.
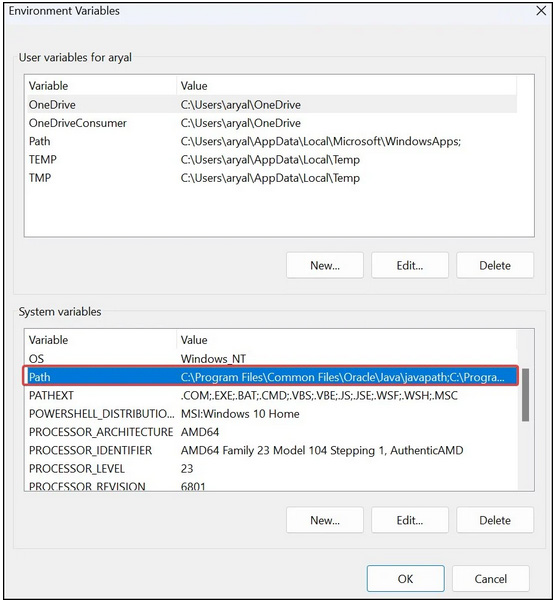
3. To add new route variables, click New under System variables.
4. Give the variable name _JAVA_OPTIONS and a Variable value of -Xmx512M to the Variable options and click Ok.
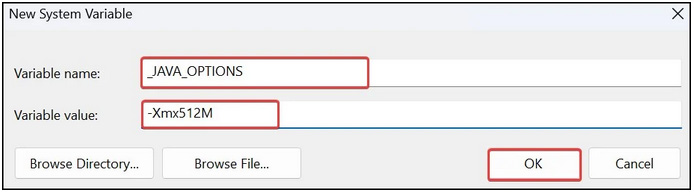
5. To save the changes, click Ok once again.
Update the Path Variable
The Windows operating system uses path variables to point to and activate Java executable files. If this path is not specified correctly, you may see errors such as Could Not Create The Java Virtual Machine. To provide the path for Java, follow these instructions.
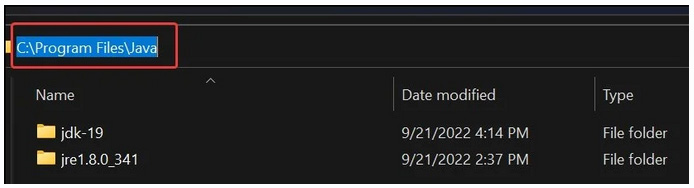
1. Navigate to C:\Program Files\Java and choose the Java development kit (JDK) you wish to use.
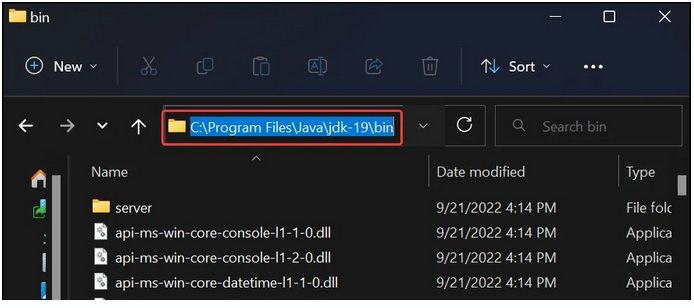
2. Copy the file path to this place from the bin folder. For example, we are transferring the file path C:\Program Files\Java\jdk-19\bin here. This file directory may change depending on your device.
3. To open Run, press Windows + R.
4. Enter the command sysdm.cpl.
5. Navigate to the Advanced tab.
6. Select Environment Variables.
7. To modify the Path variable, double-click it under system variables.
8. Click the New button and paste the JDK file path we copied before into the box. Then press the OK button.
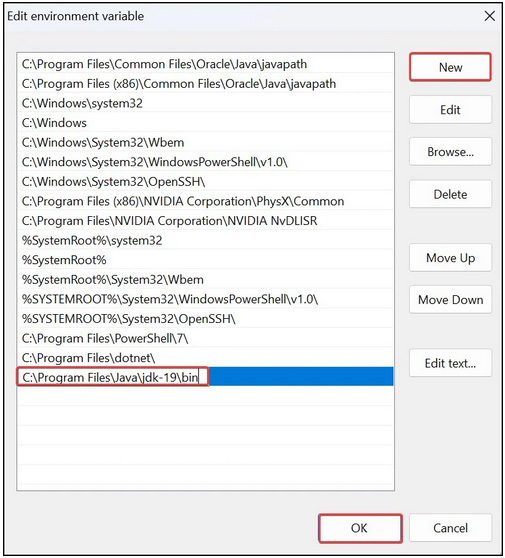
9. Finally, press OK to preserve your changes.
Use Administrative Privileges to Run Java
Such error messages may appear if the Java executable file is not granted adequate rights in the Windows operating system.
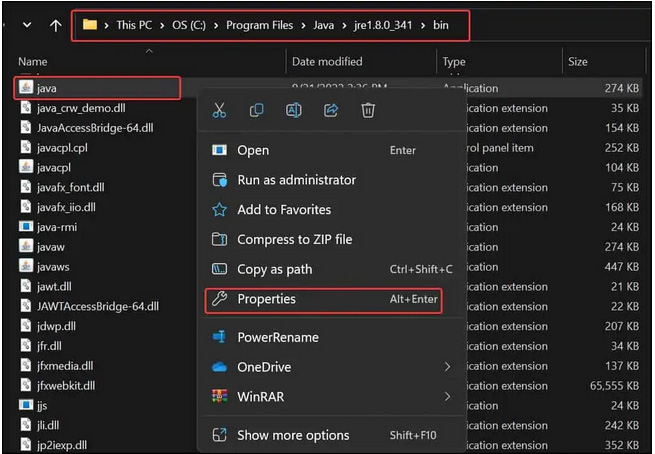
1. Navigate to the directory where the Java Runtime Environment (JRE) is installed using File Explorer. JRE is installed in this situation.
C:\Program Files\Java\jre1.8.0_341\bin
2. Locate and right-click the java.exe executable file.
3. Select Properties.
4. Navigate to the Compatibility tab.
5. Check the Run this software as an administrator option in the Settings section.
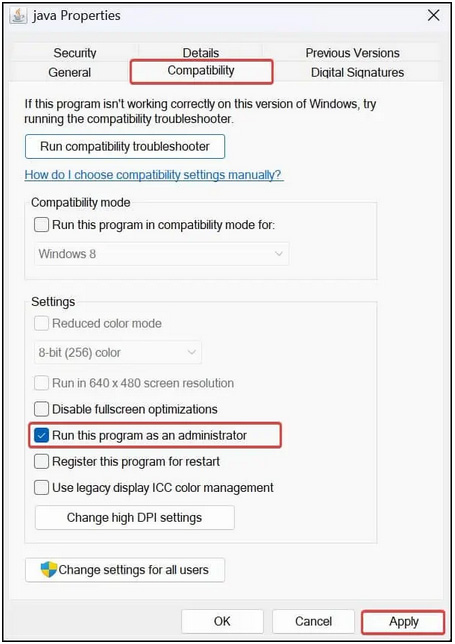
6. To save your changes, click on Apply button.
Reinstall Java
If you continue to see the error notice, the problem may be with Java itself. It’s possible that the files associated with it have been corrupted or that your version is obsolete and incompatible. You may reinstall Java to make it operate properly. But, first, open the Windows Settings by pressing Windows Key + I.
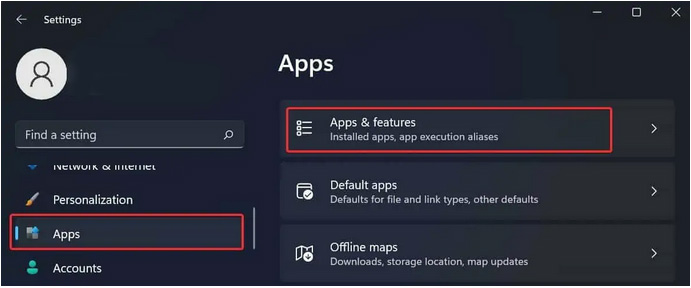
1. Navigate to Apps > Apps & Features.
2. Look for Java and then click the three dots on the side of it.
3. Uninstall will prompt you for confirmation before removing it.
4. Now, go to the Java download page and download the desired version.
5. Finally, launch the executable file to begin installing Java.
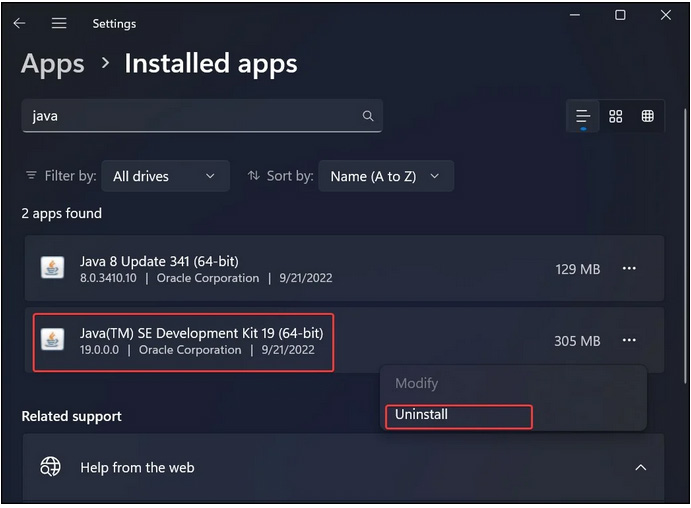
Note: Install the correct Java version (64 or 32-bit) for your program. You may install 64-bit and 32-bit Java to ensure compatibility with all Java-based apps.
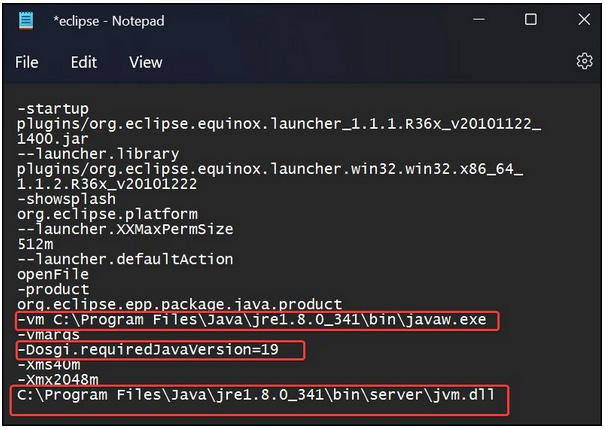
Configure Java from the Eclipse Configuration file
Eclipse is an integrated development environment (IDE) designed for several programming languages, although it is most widely used for Java. To resolve the Could Not Create The Java Virtual Machine, modify the .ini file in Eclipse’s installation directory. For most people, pointing to the jvm.dll in the eclipse.ini file fixes the problem.
1. Navigate to the Eclipse IDE installation folder.
2. Open Notepad and look for the eclipse.ini file.
3. Remove the line that points to the VM.
-vm C:\Program Files\Java\jdk-19\bin
4. Specify -Dosgi.requiredJavaVersion=1.5 To the currently installed JDK version, add -Dosgi.requiredJavaVersion=19 in this case.
5. Above the -vamargs line, add a new line. Replace the JRE field with the version you currently have installed.
-vm C:\Program Files\Java\jre1.8.0_341\bin\javaw.exe
6. Insert a line referring to jvm.dll.
C:\Program Files\Java\jre1.8.0_341\bin\server\jvm.dll
7. Finally, save the eclipse.iniconfiguration file.
Note: Please remember that the file locations and JDK/JRE versions stated in the syntaxes may change depending on your system. As a result, change the versions and folders on your device by confirming them.
Final Words To Fix Could Not Create The Java Virtual Machine Error
A virtual machine error indicates that you have insufficient admin access or that Java requires a bigger global maximum heap memory size. You can fix the Could Not Create The Java Virtual Machine Error by following the steps mentioned on this page.